The Best Photography Spots at Diamond Beach and the Lagoon
An Icelandic guide's photo map of Diamond Beach and Jökulsárlón: best spots, blue-hour and low-sun timing, gear tips, and the surf safety that keeps you and your camera alive.
 By Björn Einarsson, Iceland South Coast & glacier-lagoon tour guide and local specialist
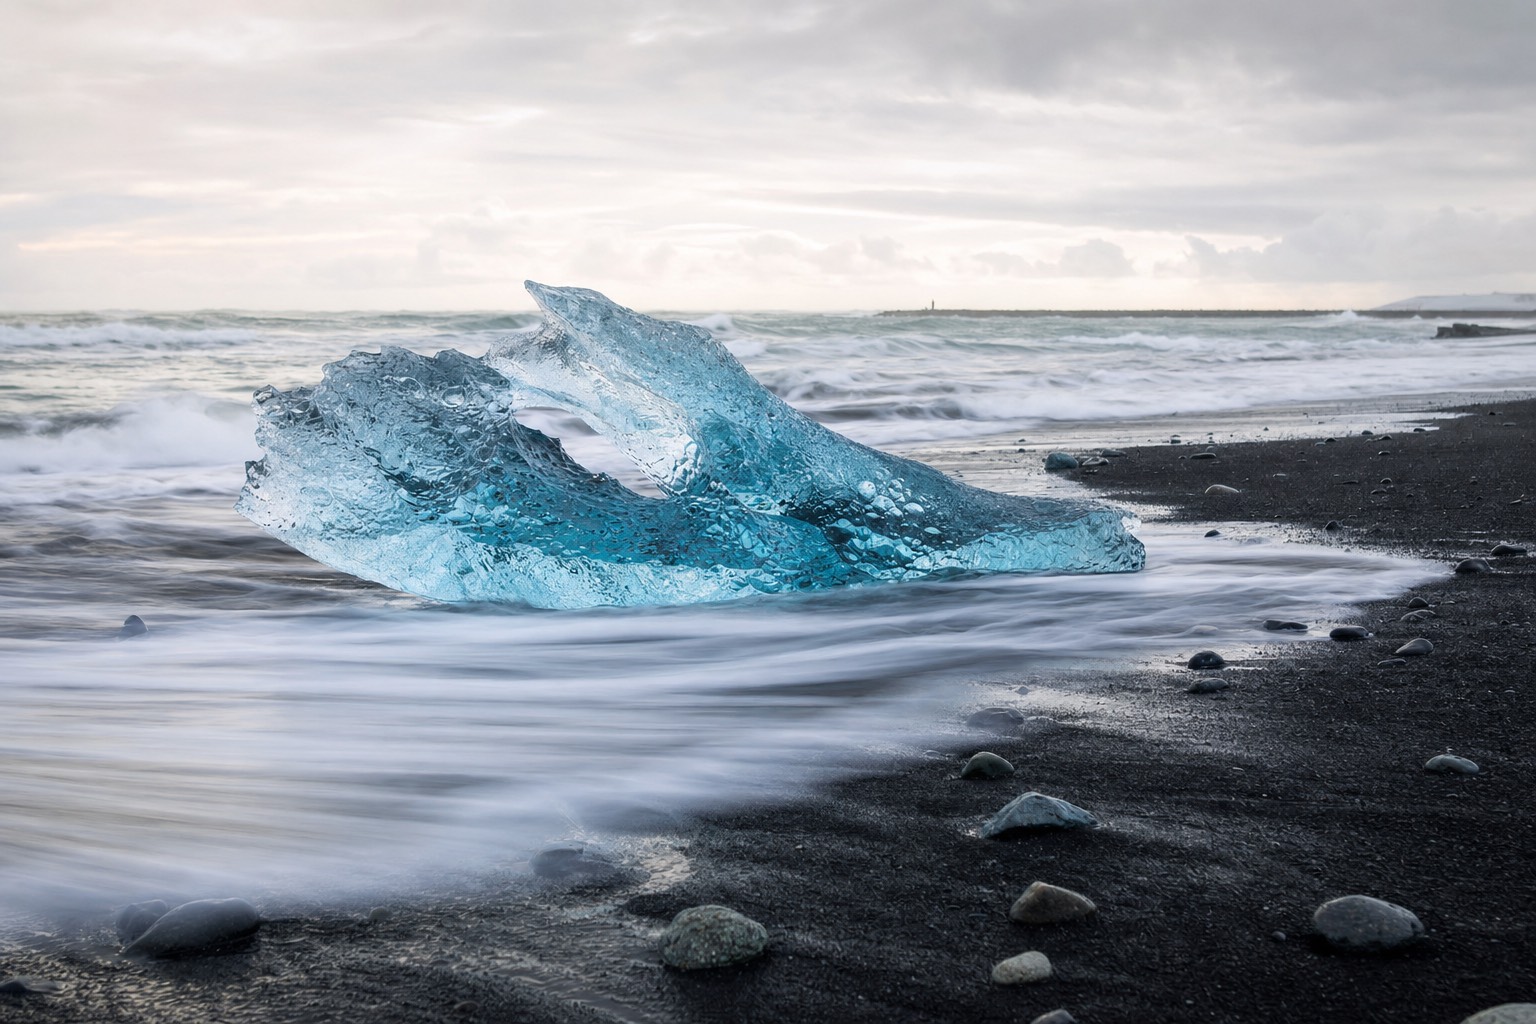
There is a moment, right after a wave pulls back, when the water sheets off a stranded chunk of ice and the whole thing lights up from inside like a lamp. You get maybe two seconds. Then the sand goes matte again and you are just standing on a freezing beach with cold feet. I have watched hundreds of people miss that moment because they were looking at the ice instead of the water, and the water is the whole game here. Get the timing wrong and you have a snapshot. Get it right and you have the photo you came 380 kilometres for.
I guide this coast and I have stood at Breiðamerkursandur in most weathers the south-east throws at you, from flat grey drizzle to a low January sun that never really clears the horizon. So this is not a gear-review blog. It is where to point yourself, when the light actually turns on, and the one safety rule that matters more than any lens you own.
When does the light actually turn on at the lagoon and the beach?
The best light is early and late, not midday. Aim for the hour around sunrise and sunset for low golden side-light, and the blue hour just before and after for cool, even tones on the ice. In deep winter that window is generous because the sun barely climbs; in high summer you chase a long, soft golden band instead of true darkness.
Iceland's daylight swings harder than almost anywhere people travel to shoot. Near the June solstice you get up to around 21 hours of light, a long low sun that smears golden hour across most of the evening and never truly sets. That sounds like a gift, and for ice and surf it is. What it kills is aurora work: with no real darkness from roughly late May into July, the northern lights simply cannot show. The flip side is deep winter, when the sun sits so low all day that you can get warm, raking light at times that feel almost civilised, no 3 a.m. alarm required.
The practical read: in summer, shoot the "golden band" late in the evening when the crowds thin and the sun rakes along the beach. In winter, you have fewer hours but softer, more usable ones, plus a real shot at aurora after dark. I break the month-by-month trade-offs down further in my guide to the best time to visit Diamond Beach, because the light and the crowds move together.
| Season | Rough daylight | Best photo window | What it suits |
|---|---|---|---|
| Deep winter (Dec–Jan) | Only a few short hours | Low sun most of the "day", aurora after dark | Warm side-light on ice, blue hour, northern lights |
| Shoulder (Feb–Apr, Sep–Oct) | Building or fading fast | Real sunrise and sunset, plus dark nights | Golden hour, blue hour, aurora, fewer crowds |
| High summer (Jun–Jul) | Up to ~21 hours | Long golden evening band; no true dark | Surf and ice in soft light, midnight-sun colour |
Which side of the bridge, and which spots, actually deliver?
Diamond Beach spans both sides of the river bridge, and they shoot differently. The eastern side, toward Höfn, usually catches the bigger, more scattered ice and is the classic hero shot. The western side is quieter for clean, minimal compositions. Across the road, the lagoon shore gives you reflections and calving ice, a completely different picture.
Most day-trippers pile onto the first patch of sand they reach and never realise there is a whole other beach on the far side of the bridge. Walk it. The ice redistributes with every tide, so the "good" side changes day to day, and the only way to know is to look at both. On a falling tide you get fresh diamonds newly stranded and still glassy; on a rising tide the surf reaches further up and the long-exposure work gets dramatic and dangerous in equal measure.
Do not treat the lagoon as an afterthought either. Cross the road from the beach and you are on the shore of Iceland's deepest lake, where bergs drift, roll and calve. Early morning, before the wind gets up, the water can go mirror-flat and you get reflections that the beach never offers. For the story of what you are actually photographing out there, the ancient blue ice and the seals, I wrote a whole piece on what Diamond Beach is actually like once you get past the postcard.
| Spot | Best light | What to shoot | Watch for |
|---|---|---|---|
| Beach, east of the bridge | Low sun, blue hour | Big scattered "diamonds", surf swirl, hero wide shots | Sneaker waves at the surf line |
| Beach, west of the bridge | Sunrise, overcast | Clean minimal compositions, single ice on black sand | Softer ice supply, check the tide |
| Lagoon shore | Calm early morning | Reflections, drifting and calving bergs, seals | Crumbling edges, do not step on ice |
| Bridge and river mouth | Golden hour | Ice riding out to sea, motion in the channel | Traffic, narrow verge, stay off the road |
How do you shoot surf around the ice without losing your gear or your life?
Never set a tripod at the water's edge with your back to the sea. Diamond Beach has sneaker waves and strong rip currents that surge far up the sand without warning, and photographers fixed to a tripod are exactly who gets caught. Keep the sea in your peripheral vision, watch several wave sets before you commit, and be ready to grab and run.
This is the part I will not soften, because people have died on these black beaches. Iceland's official safety service is blunt about it: sneaker waves on the south coast arrive unpredictably, far bigger than the sets before them, and the rip currents pull hard in glacial water cold enough to disable you in minutes. The black-beach safety guidance from safetravel.is exists because visitors keep getting swept off their feet, and a photographer crouched over a long exposure, eye to the viewfinder, is the classic victim. A tripod does not just anchor your camera. It anchors you, at the worst possible second.
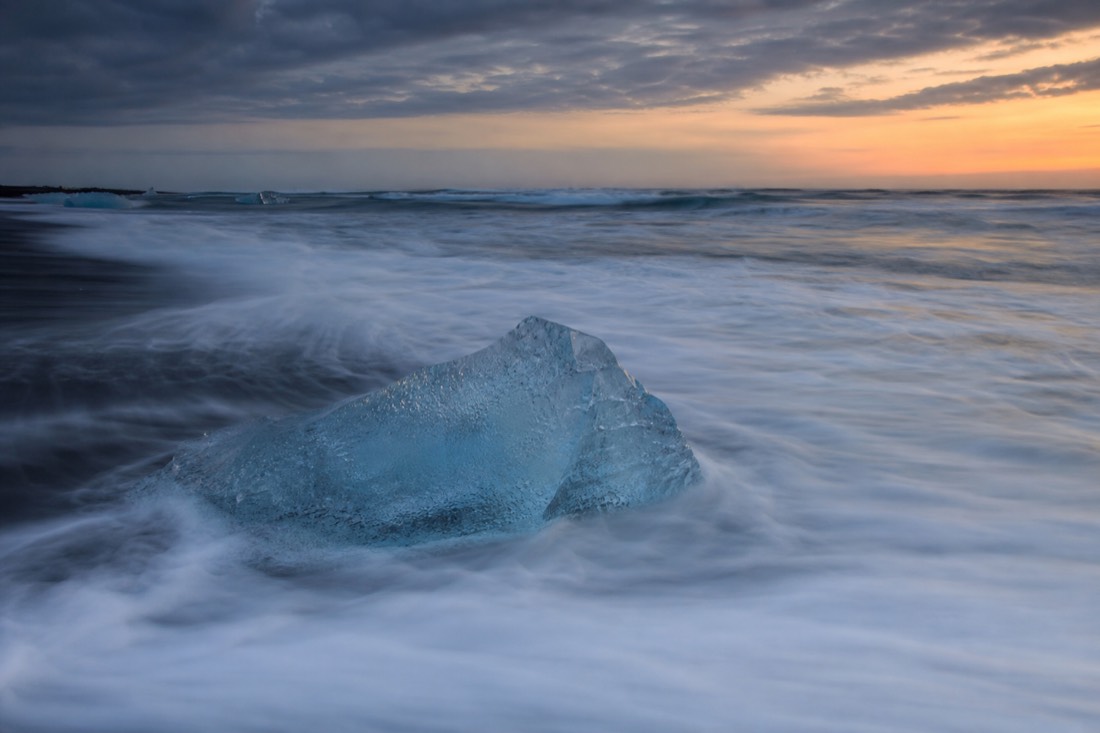
So here is how I work the surf shots. I stand where the sand is already dry and read the water for a full minute first, counting how far the biggest wave reaches. I set up above that line, shoot the swirl as the water retreats rather than as it charges in, and I keep my strap on and my weight balanced to move. If a wave looks wrong, the camera is replaceable and I am not. Salt spray is the smaller enemy, but it still kills gear: a wet lens cloth in a pocket and a quick wipe between frames saves your glass, and you rinse everything in fresh water that night.
What gear do you actually need on a black-sand beach?
Less than the internet tells you, but pick it well. A sturdy tripod, a circular polariser and a mild ND filter cover almost everything here. Add a wide lens for the beach, a short telephoto for the lagoon, spare batteries kept warm, and a way to shield the front element from spray and wind. Everything else is a nice-to-have.
The tripod is the one thing you cannot fake, and cheap ones are a false economy on a windy beach where the legs sink into wet sand. Push the legs in firm, hang your bag off the centre column for ballast, and reset it every few frames because the sand shifts under a retreating wave. The ND filter is what lets you drag the shutter to blur surf in daylight; a 6-stop is a good all-rounder, a 10-stop for brighter conditions. A polariser cuts glare off wet ice and deepens the lagoon, though I take it off for aurora and low light because it eats too much of what little light there is.
Cold is the quiet gear-killer. Batteries drain fast in Icelandic wind, so I keep two or three in an inside pocket against my body and swap them as they fade. Bring more cards than you think, a proper microfibre cloth (plural, they get soaked), and gloves you can actually operate dials in. If you want the fuller picture of what the day costs beyond kit, the drive, the food, the parking, I laid it out in what Diamond Beach is actually like.
| Gear item | Why it earns its place | Field note |
|---|---|---|
| Sturdy tripod | Long exposures, sharp low-light frames | Weigh it down; sand shifts under waves |
| Circular polariser | Cuts glare on wet ice, deepens the lagoon | Remove for aurora and dim light |
| ND filter (6–10 stop) | Blurs surf and drifting ice in daylight | 6-stop for dusk, 10-stop for bright days |
| Wide + short telephoto | Wide for the beach, tele for lagoon ice and seals | One body, two lenses is plenty |
| Spare batteries | Cold drains them fast | Keep warm against your body, swap early |
| Cloths and rain cover | Salt spray and drizzle are constant | Wipe the front element every few frames |
How do you get the northern lights over the ice?
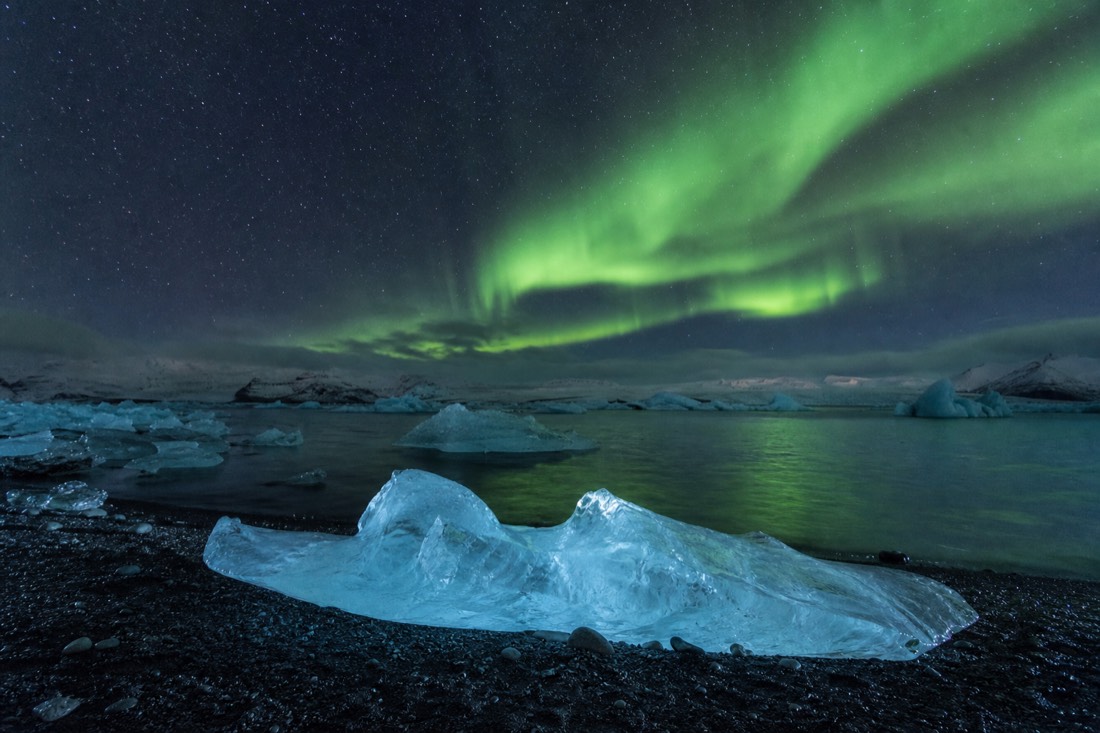
You need real darkness, a clear sky and a decent forecast, which means late autumn through early spring, never summer. Use a stranded iceberg or the lagoon as your foreground, shoot wide and fast, and check the official aurora forecast before you commit the night. The ice glowing under a green sky is the shot, but it is a winter-only prize.
The single most common disappointment I hear is from summer visitors who expected the aurora over the diamonds. It cannot happen: with up to 21 hours of light near the solstice there is no darkness for the lights to appear against. From roughly September to April, though, the same beach becomes one of the best aurora foregrounds in the country, because a lit-up chunk of ice gives the sky something to stand on. Before you drive out, read the Icelandic Met Office aurora forecast, which pairs solar activity with cloud cover, the two things that actually decide your night.
Composition-wise, get low and put a strong piece of ice in the near frame, then let the sky do the rest. Shoot wide and fast, focus manually on a bright star or a distant light, and expect to bracket your exposures as the aurora brightens and fades. This is a night shoot on a hazardous beach, so the same surf rule applies in the dark, doubly: you cannot see the sneaker wave coming. I go deeper on timing, KP numbers and where to stand in my guide to the northern lights at Jökulsárlón and Diamond Beach.
What camera settings work for each shot here?
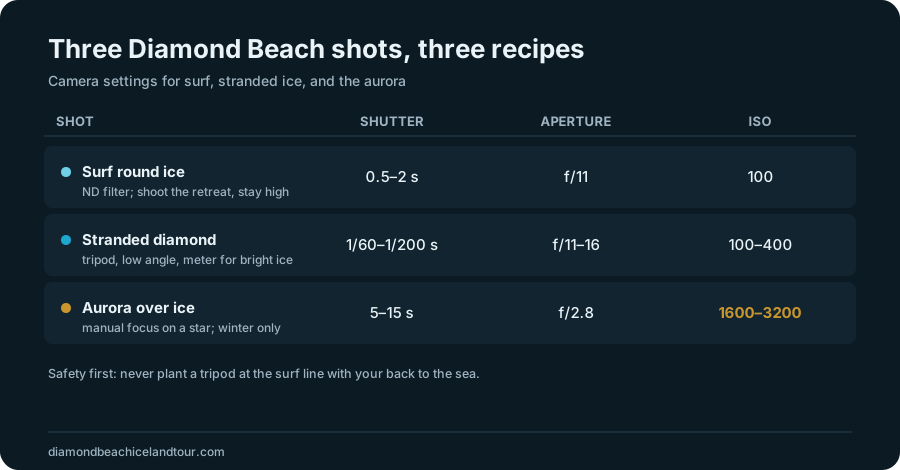
There is no single setting, because the beach, the lagoon and the aurora each want different things. Surf swirl needs a slow shutter and an ND filter. Sharp ice needs a small aperture and a tripod. Aurora needs a wide, fast lens and a high ISO. Learn the three recipes below and you can shoot the whole site.
Treat these as starting points, not gospel, because light here changes by the minute. The one constant is the tripod for everything except handheld daytime frames. I meter for the highlights on bright ice so the diamonds do not blow out, then lift the shadows later, since the black sand holds detail better than you would think.
| Shot type | Rough settings | Approach |
|---|---|---|
| Surf swirling round ice | ND filter, 0.5–2 s, f/11, ISO 100 | Shoot the retreat, not the charge; stay above the wet line |
| Sharp stranded "diamond" | f/11–f/16, 1/60–1/200 s, ISO 100–400 | Tripod, low angle, meter for the bright ice |
| Lagoon reflection at calm | f/8–f/11, 1/30 s, ISO 100 | Early, wind-free morning; level the horizon |
| Aurora over the ice | Wide fast lens, f/2.8, 5–15 s, ISO 1600–3200 | Manual focus on a star, ice in the foreground |
Is it worth hauling all this gear that far?
For a photographer, yes, but the drive is the catch. The lagoon and beach sit around 380 kilometres from Reykjavík, five to six hours each way, and self-driving that in winter dark after a night shoot is how good trips go wrong. If you would rather spend your energy on the light than on Route 1, let someone else take the wheel.
I say this as someone who loves the drive and still respects it. Doing 760 kilometres round trip in a single winter day, on ice, chasing a sunrise, is a lot to ask of anyone who also wants to concentrate on framing a shot. This is where the guided day earns its place for a lot of shooters. A fixed-schedule guided day can handle the road while you save your attention for the lagoon and beach. The trade-off is less control over the light and the length of each photography stop.
Be honest with yourself about what a group coach gives and does not give a photographer. You get the drive handled and a set window at the two best spots, which is plenty for strong images. What you do not get is total control of your timing, so you shoot the light you are handed rather than waiting three hours for the cloud to break. For most people that trade is well worth it. If you are chasing one specific aurora night or a precise blue-hour minute, that is when a private car starts to make sense.
Come with a plan and leave room to abandon it. The ice will not be where the last photographer found it, the light will do something you did not forecast, and the best frame of your trip will probably be one you did not picture on the drive out. Watch the water, respect it, shoot the two seconds after the wave pulls back, and you will drive home with the diamonds glowing on your memory card. That is the whole trick, and it is worth every cold hour it takes.
Your Next Step
Choose Your Ice Experience
Initial editorial suggestion. Confirm your date and party requirements with the operator.
Have a travel date in mind? Check the Reykjavík departure and pickup option before arranging the rest of your South Coast route.
Ages 6+. Allow for delays. Meals are extra; glacier hiking and ice-cave visits are separate experiences.
Refine Your Choice And View Alternatives
Reykjavik: Jokulsarlon Glacier Lagoon & Diamond Beach Tour
14-hour coach trip from Reykjavík with an English-speaking guide, Jökulsárlón and Diamond Beach stops. Pickup and the seasonal boat ride depend on the booked option.
This tool compares tour formats, meeting points, listed ages, seasonal windows and duration. Seasonal guidance is not live availability. It does not confirm availability or personal suitability. Local activities do not include the drive from Reykjavík; leave extra time for travel and check-in.